Processing Titles
Processing a title involves doing a quality control comparison of
the gathered site with the publisher's original site and then either fixing
problems (such as missing files) or identifying and noting problems and handing
the title over to PANDORA technical support for fixing.
When a title has been gathered it will appear in the Completed
area of the Gather Queue screen.
Recently gathered titles that you own will also appear in the Current Messages
window of the Main Menu screen and in
My Process List.
Procedures covered in this section include:
Begin Processing an Archived
Title
- There are a number of ways to access a gather to begin
processing it. In the completed area of the Gather
Queue click on the 'p' symbol for the title you wish to process. Or in the
Main Menu screen select the menu item
My Process List and click on the title you wish
to process. Alternatively, Search for the title
and then click on the menu item Process Instances. One other method
involves clicking on the title in the Recent gather area of the Current
Messages window on the Main Menu screen. The method
shown in the next step is for accessing the gather via
My Process List.
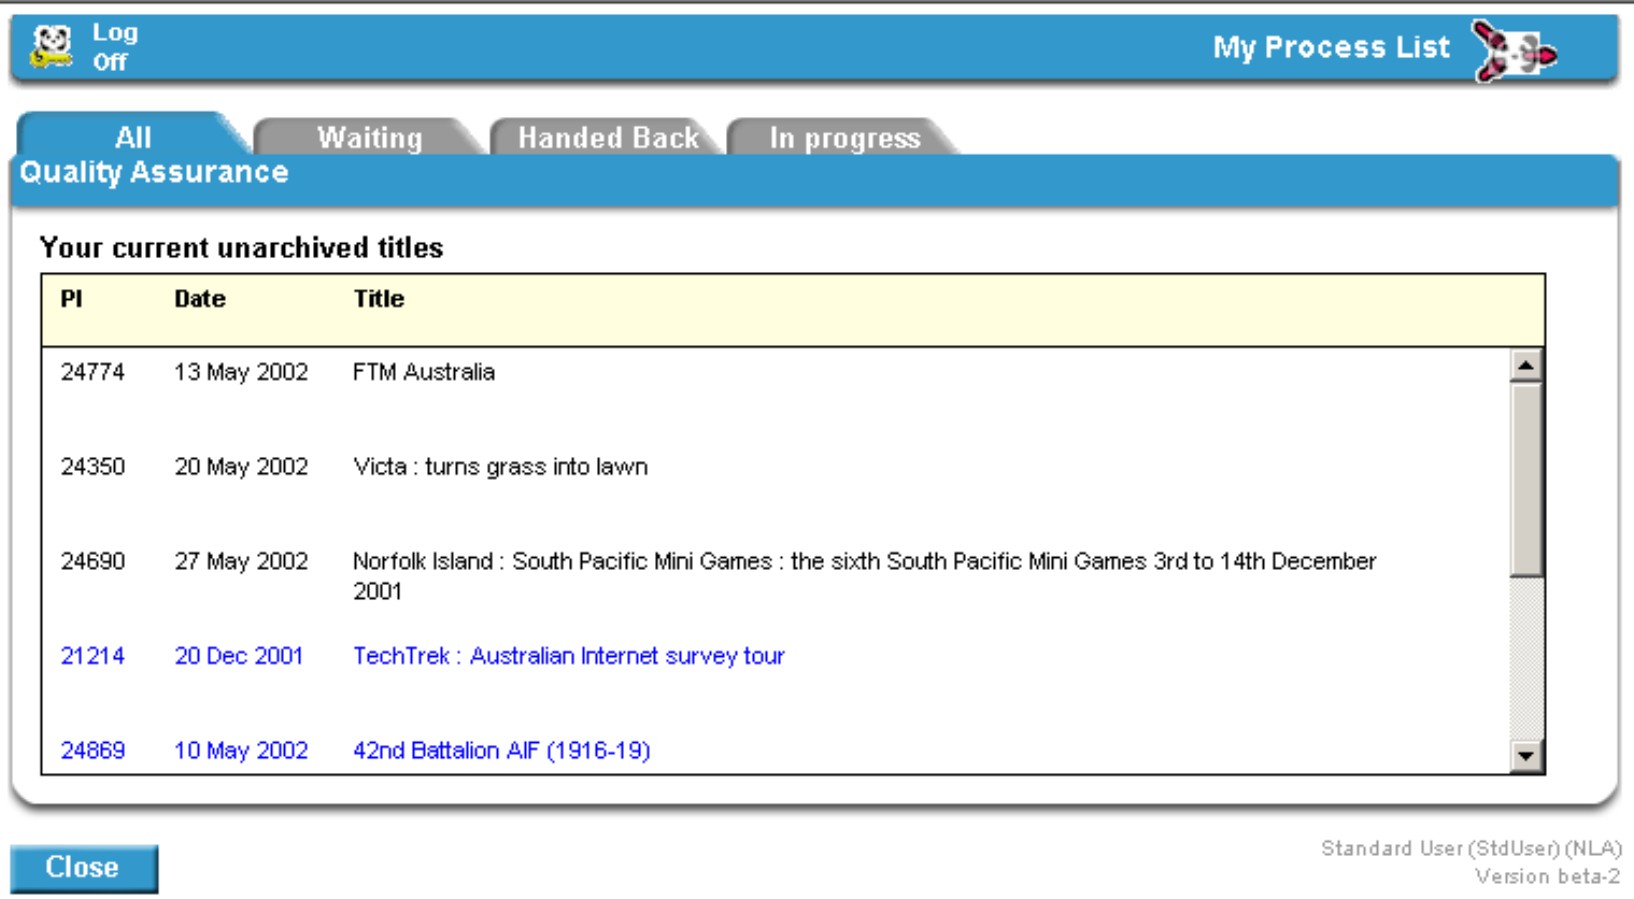
- Click anywhere on the selected title appearing in
My Process List to begin processing the title.
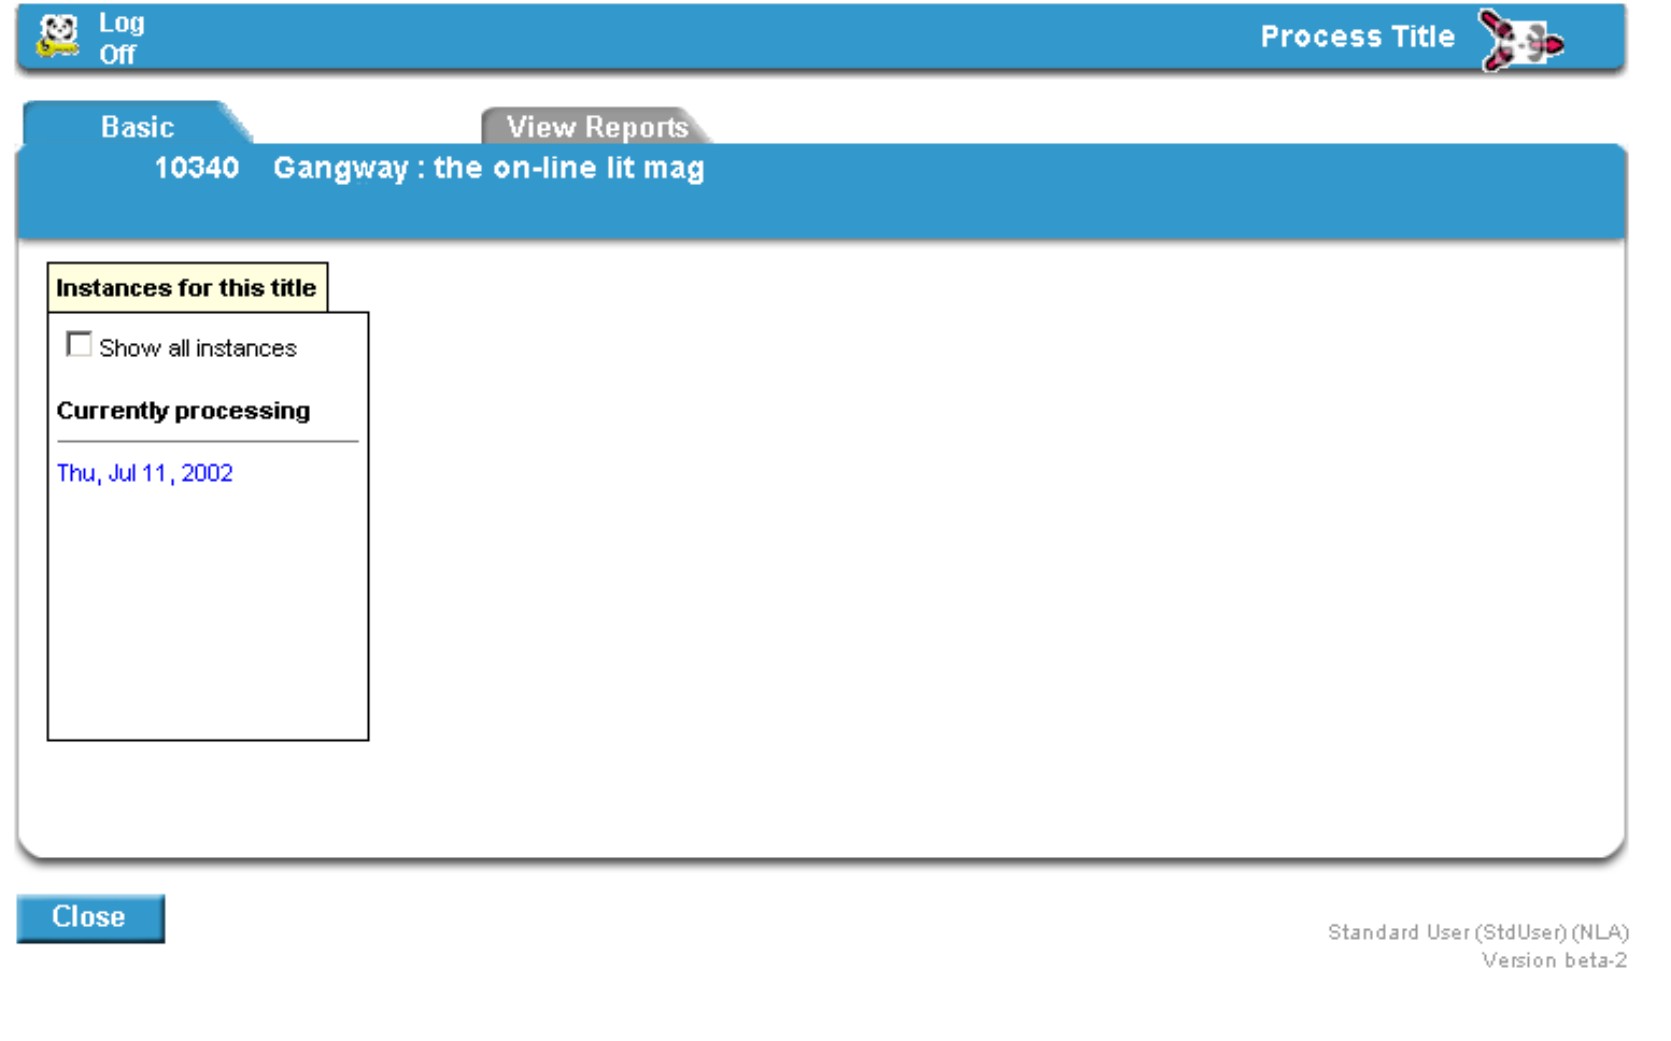
- On the Process Title screen click on the Date of
the gathered instance you wish to work on (this will be listed as a link under
the heading of Currently processing).
 This
brings up a screen populated with data from the gather, links to the live and
gathered versions, tabs for creating and viewing error reports, and a tab which
allows access to manipulate the gathered files: This
brings up a screen populated with data from the gather, links to the live and
gathered versions, tabs for creating and viewing error reports, and a tab which
allows access to manipulate the gathered files:
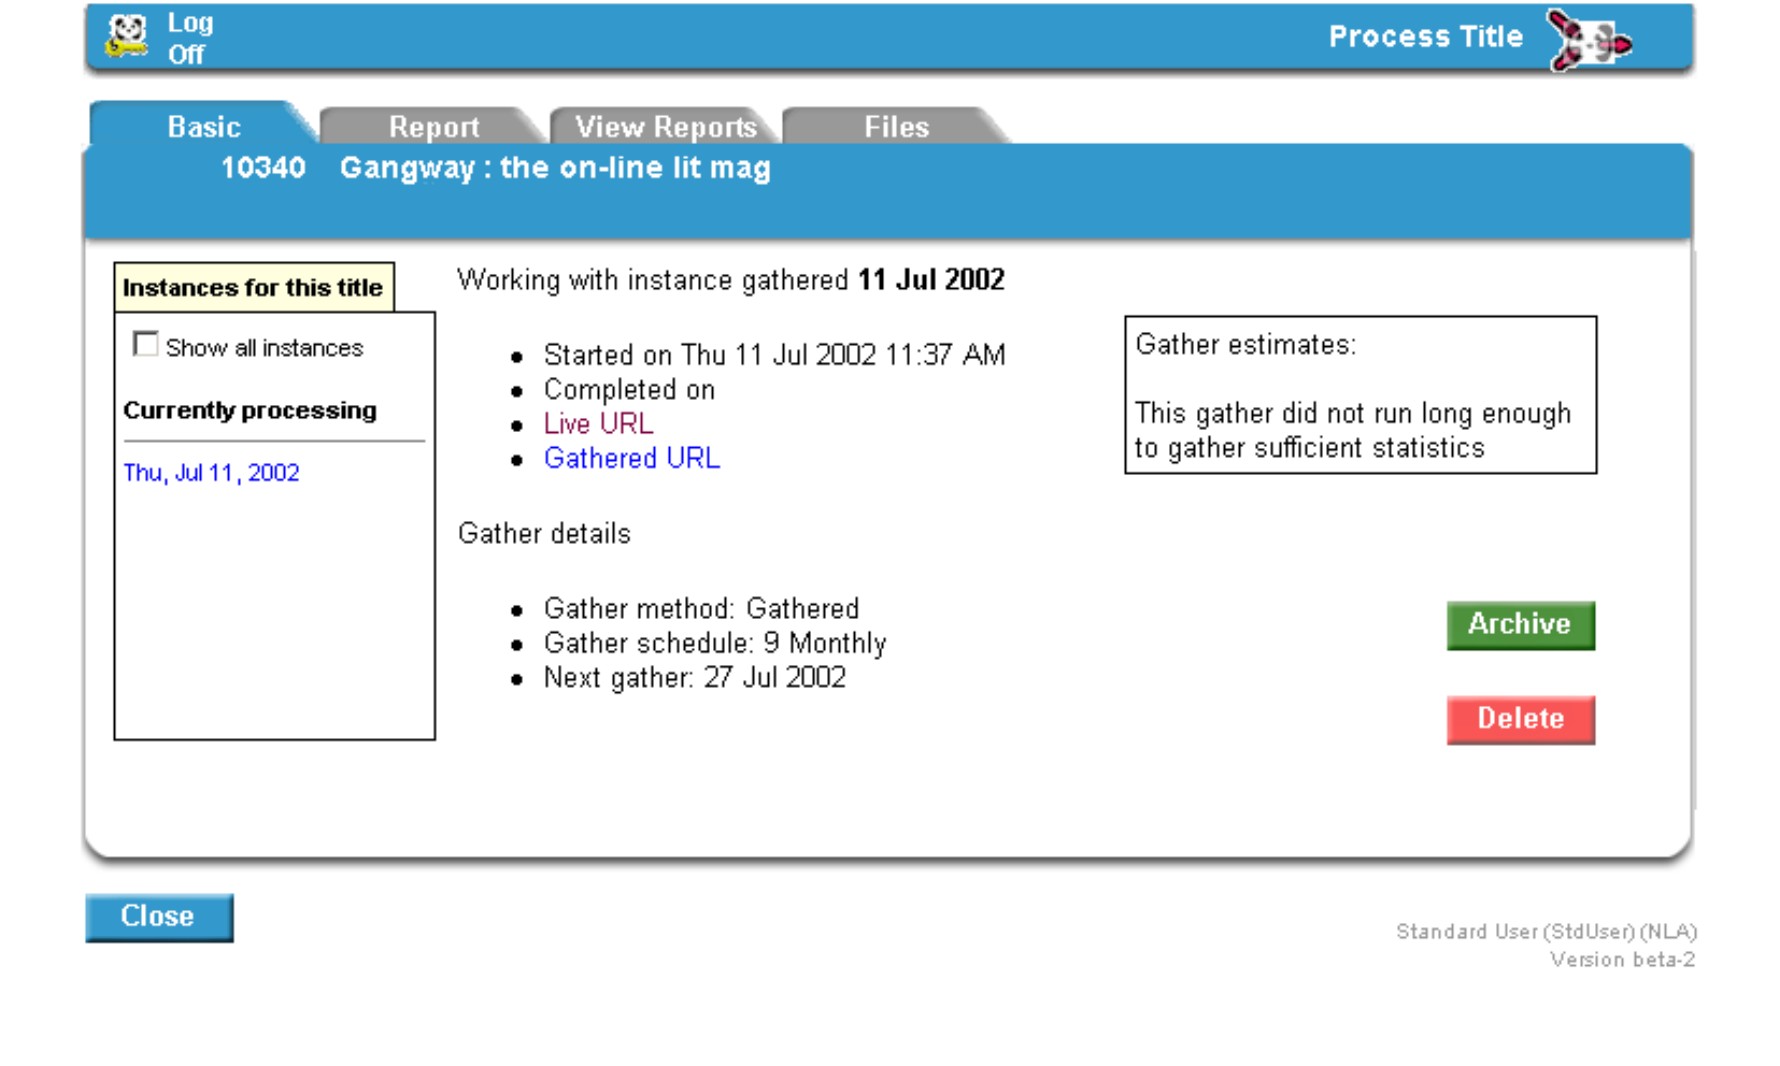
- To start processing the site click on the Gathered URL
link in the centre of the window
Viewing the Archived Instance
When the Gathered URL link is clicked, a window will pop up
asking for a username and password to enter the working area of the archive:
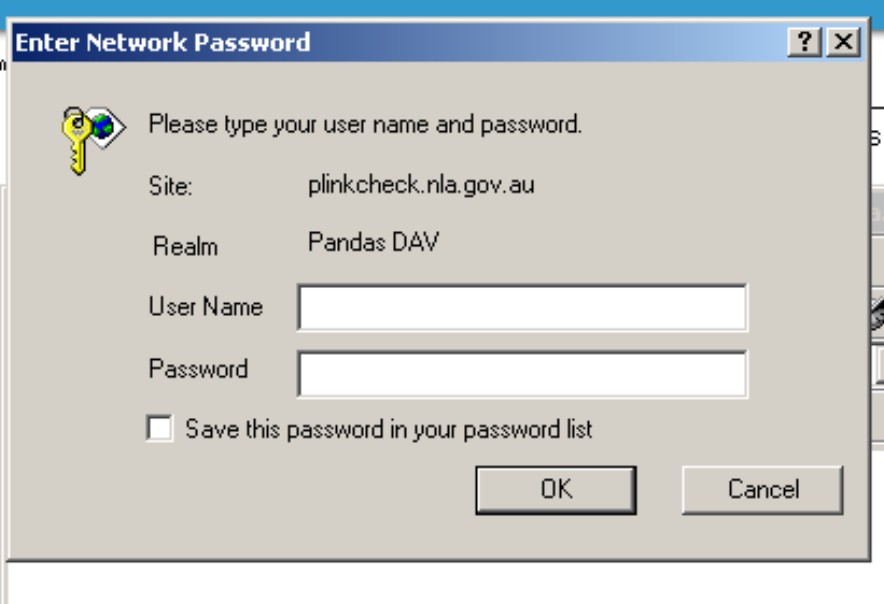
The username and password are what you normally use to access
PANDAS. Once you've entered these, a new browser window will open displaying
the working version of the gathered site. Complete a full navigation of the
archived site to check the gather is complete and functioning correctly. If
problems exist in the gathered site see the next section, Identifying and
Fixing Problems.
Occasionally, when you click on the Gathered URL link, it
will take you to a directory instead of the starting page. To rectify the
problem, you need to enter the location (URL) of the starting page in the box
designated as Starting URL under the Files tab on the Process
Title screen. Then press the update button and close the record. You
then need to go back to the Process Instances tab again. Click on the
Gathered URL link which should have been updated and it will take you to
the specified starting page.
Identifying and Fixing Problems
When processing an archived instance it is common to find problems
such as missing files or parts of the site that are not functioning properly.
Some of these problems will be basic and can be fixed by editing the files or
adding additional files to the gather, while other problems will require
intervention from the PANDORA IT technical support staff for solving.
- If you determine that the problem can be easily fixed (such as
a missing file) the next step is to click on the Files tab:
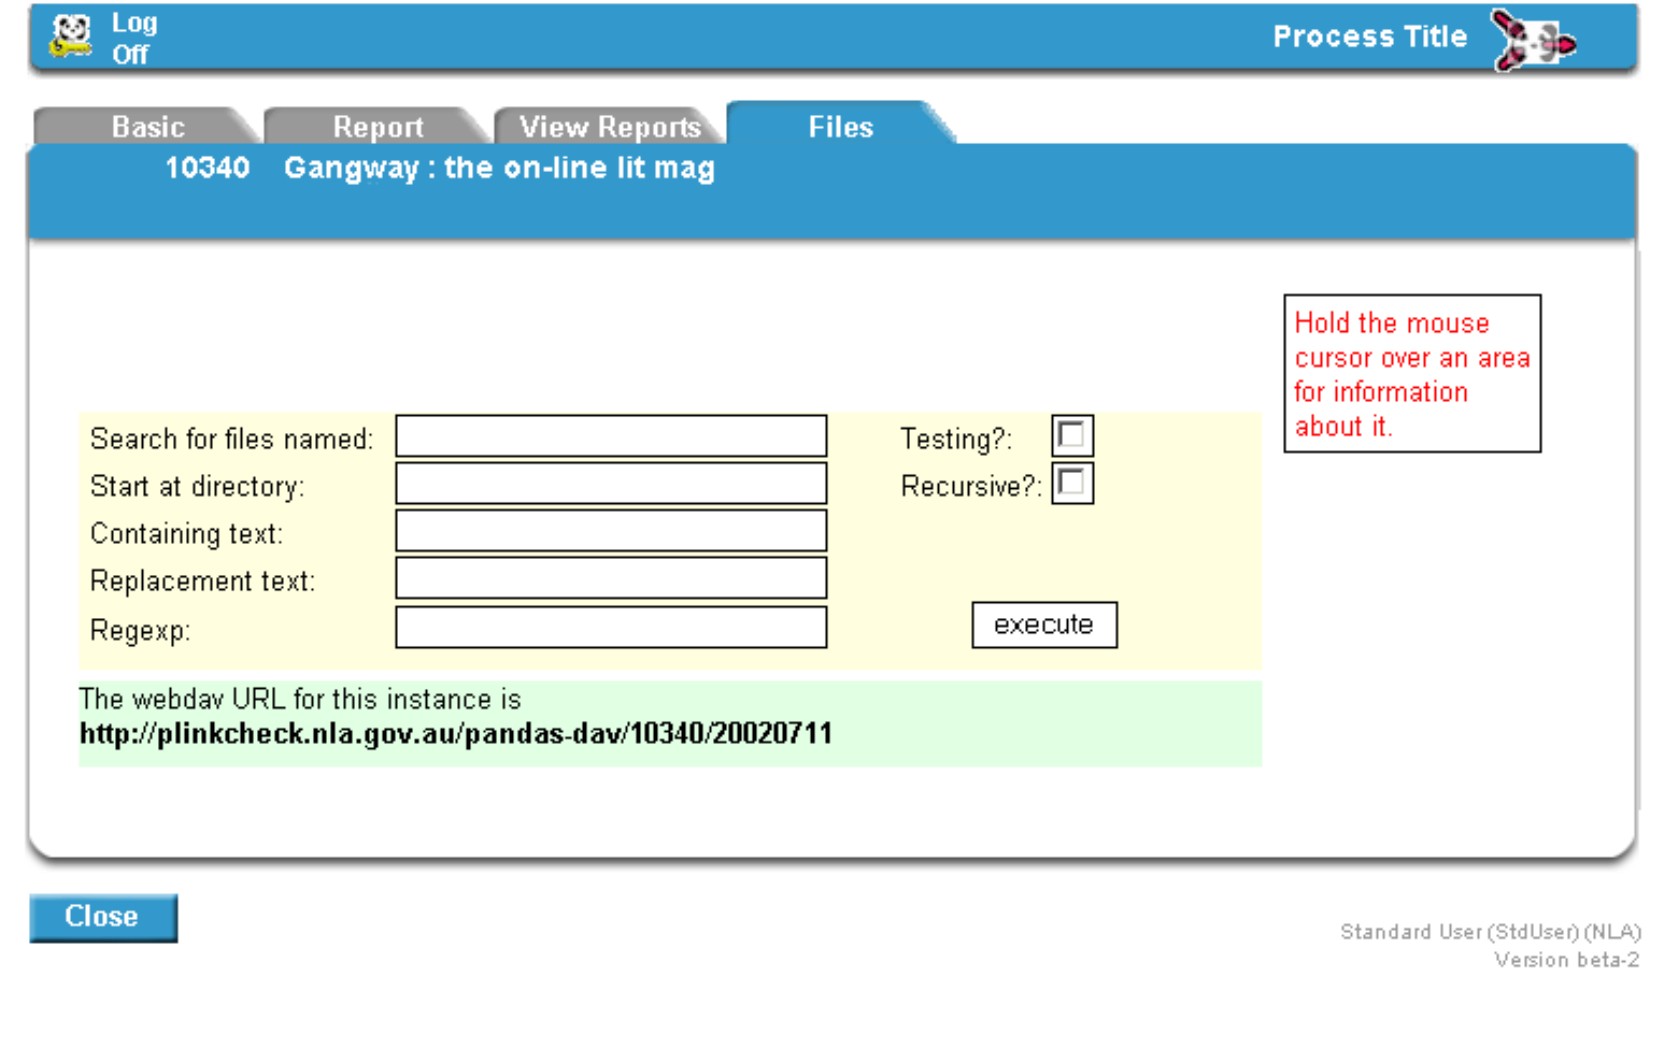
This
screen allows access to the working area of PANDORA via WebDav where
file manipulation can be carried out (WebDav stands for "Web-based Distributed
Authoring and Versioning" - it is a set of extensions to the HTTP protocol,
which allows users to collaboratively edit and manage files on remote web
servers).
- WebDav allows access to all files associated with the
particular gathered instance of the title you are processing. To enter
WebDav, highlight and copy the URL appearing in the green area of the
screen.
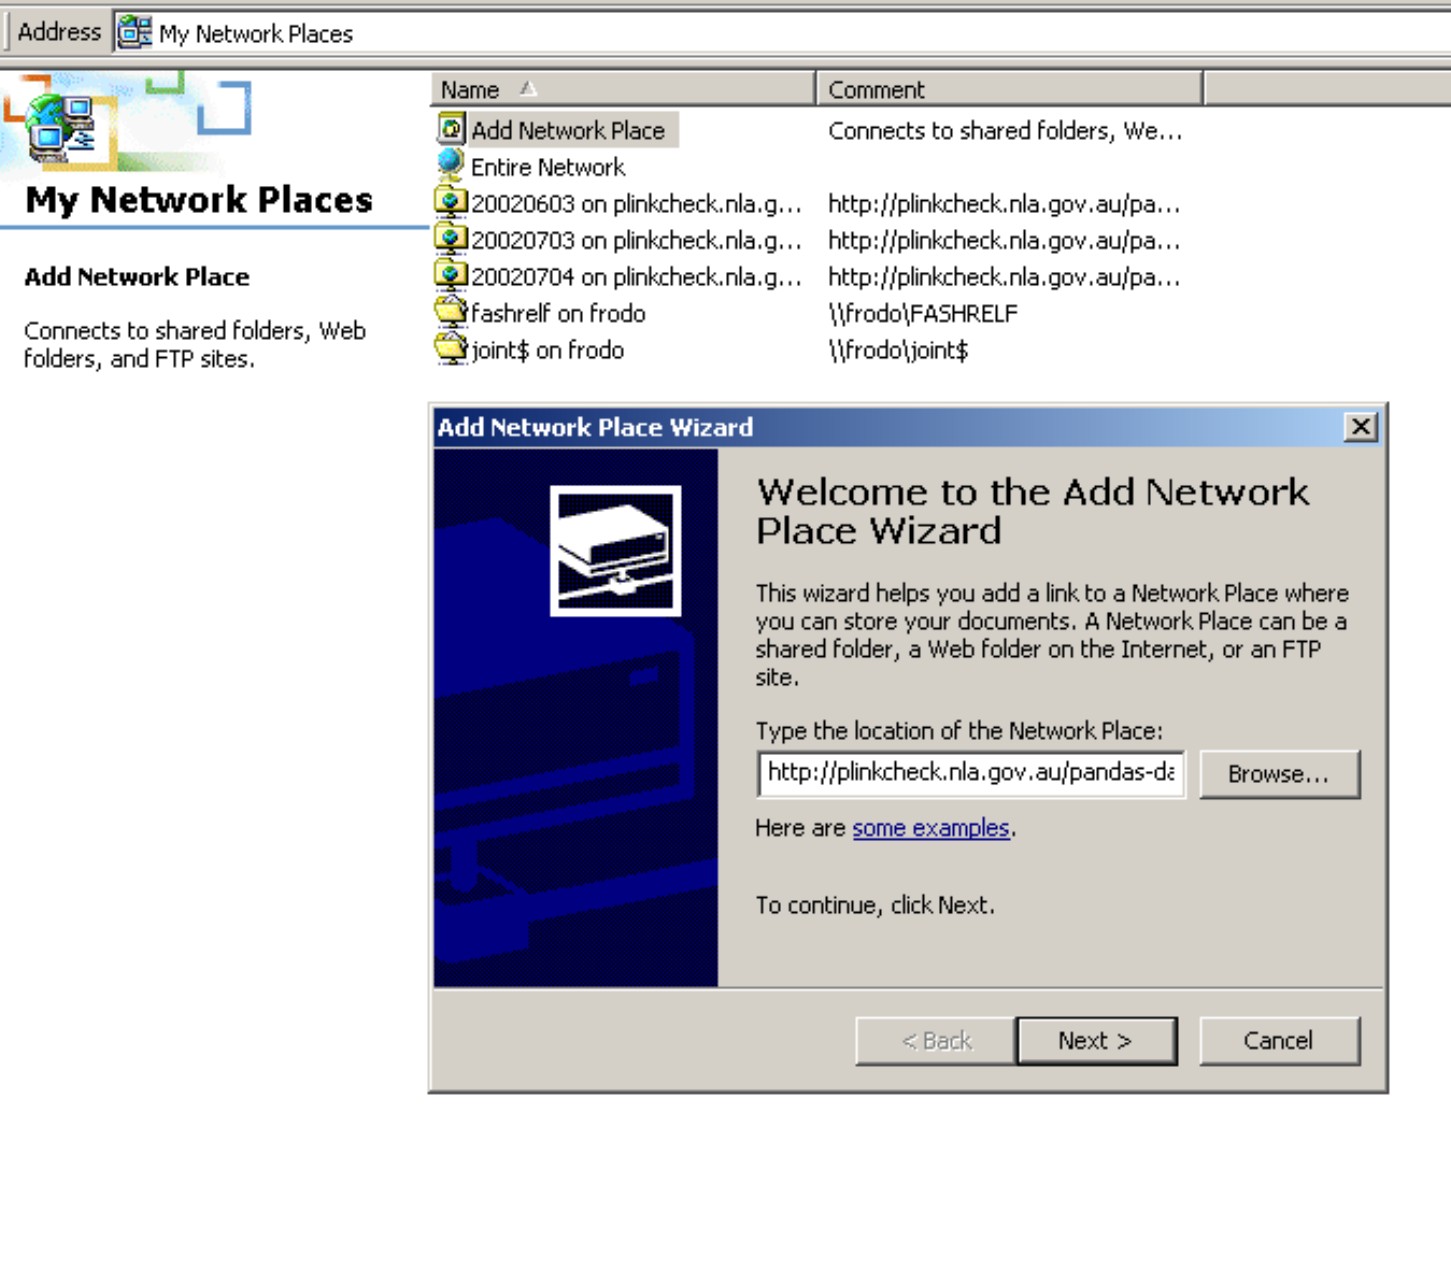
- On your PC desktop double click on the icon My Network
Places (for Windows 98 users access is available through My Computer
then Web Folders).
- Double click on Add Network Place.
- Paste the copied URL into the location box appearing in the
popup window (for Winows XP users, add a hash "#" or a slash hash "/#" to the end of the WebDav URL) and click the Next button:
- You will be prompted for your user name and password. Enter
these.
- A popup window will appear asking you to supply a name for the
network place:
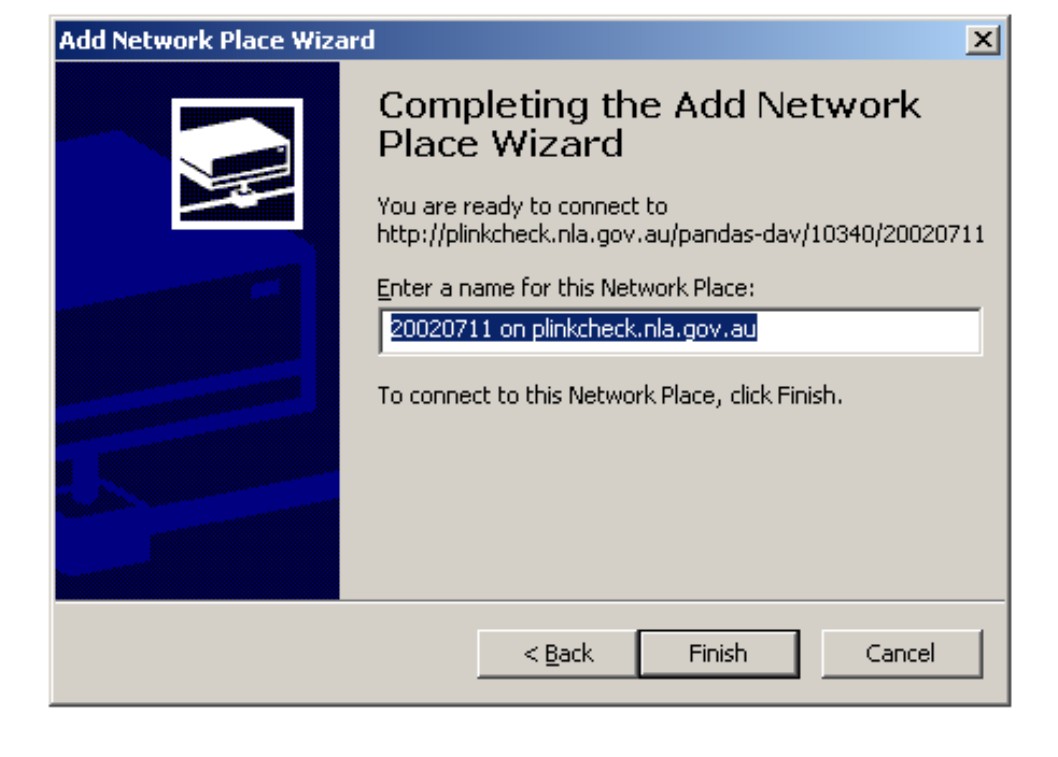
Type in a meaningful name which incorporates the
title and date of the archived instance (e.g. Gangway 11 Jul 02). and
click the Finish button. You will again be prompted for your username
and password. Enter these again.
- You will now have access to a folder containing all the folders
and files for the archived instance of the title you are processing. Here you
can add files, edit files and delete files.
Adding Files
You can add one or many missing files to the archived instance by
simply saving the file(s) locally to your PC's hard drive and then copying and
pasting them to the appropriate folder(s) (or directories) in the archived
instance. You will need to open up Windows Explorer to undertake this process.
The additional files will be immediately available for viewing within the
archived instance. Refresh the browser window containing the archived instance
to view them. If they are showing as broken images or links you will need to
ensure they have been added to the right folder (directory) and that the html
referencing for the file(s) is correct. This may mean that you will also have
to edit the html source of the file which is referencing the newly added
file(s).
Editing Files via the File
tab
There are two ways of editing files in PANDAS v.2. You can either
edit individual files using an external HTML editor
or you can edit single or multiple files via the File tab in the
Process Title screen. The File tab method is described first. In
contrast to using a HTML editor the main advantage of this method is that it
allows you to perform global editing across all files and directories in the
instance.
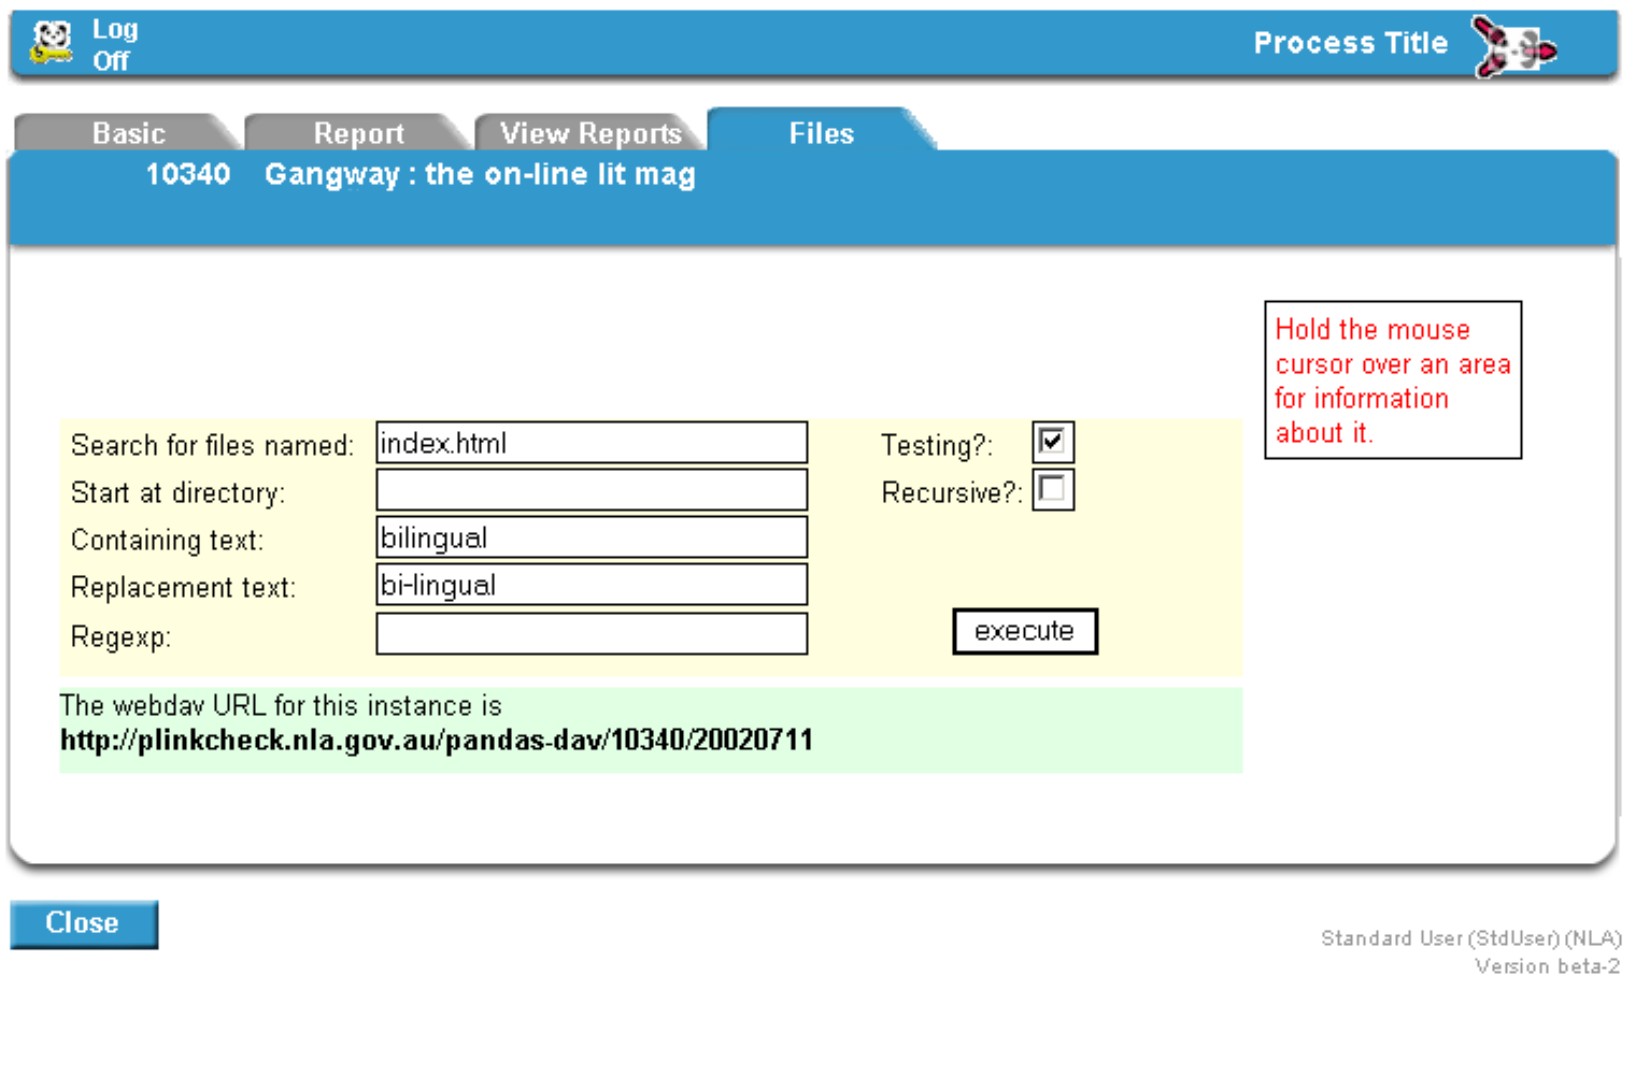
- Click on the File tab to open it:
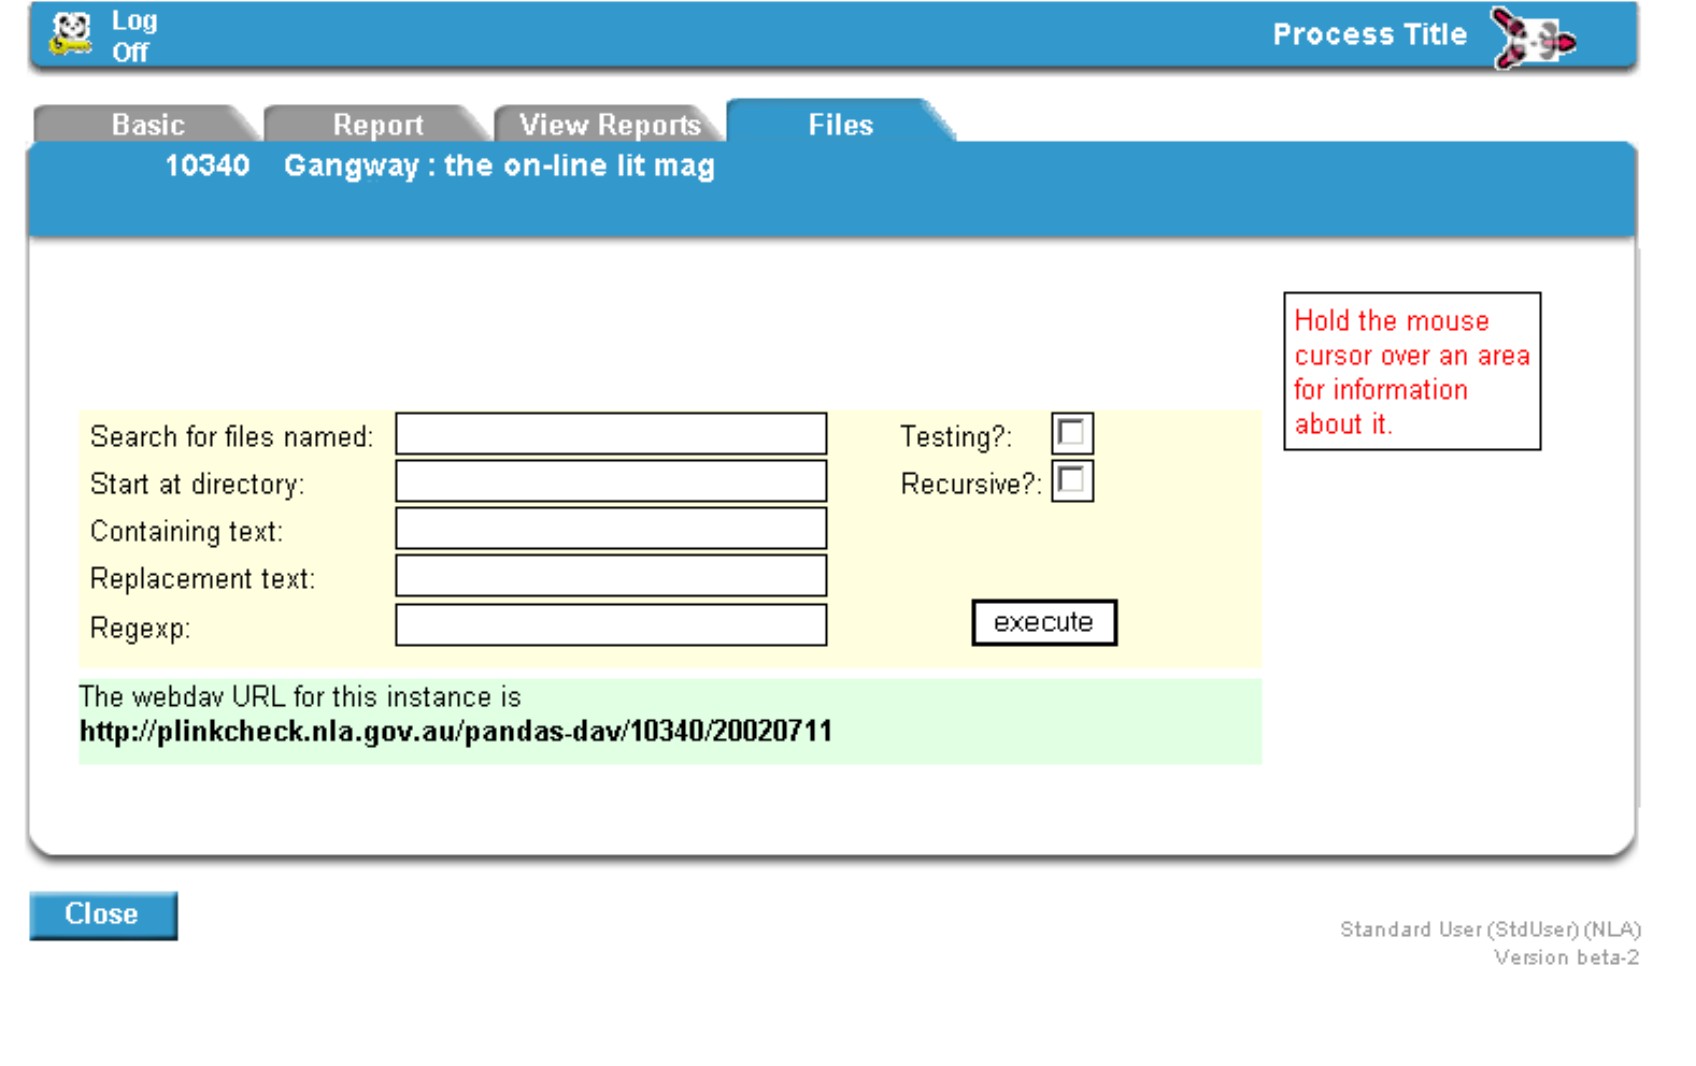
- Holding your mouse over the coloured areas provides basic
information for these areas. The help text says that file name and starting
directory are optional but if you wish to replace text (rather than just
conduct a search) you will need to specify the file in the top field box.
For global changes you will need to use the wildcard * to search and replace
text in the whole site (i.e. for all .html files use the term *.htm* in the top
field box).. The recursive box is checked by default and means changes will
be applied to all sub-directories.
You should test an edit prior to
executing it and this is done by checking the Testing field box in
conjunction with the Execute field box.
Testing a change will
produce an email message detailing the number of occurrences of the text
specified in the Containing Text field.
Executing a change
will produce an email message detailing the occurrence and replacement of the
text.
- Input (case sensitive) text in the appropriate boxes
and click the Execute button. The example shown here is testing a change
to the word bilingual in all files named index.html:
 If you want
to replace coding which contains non-text characters (i.e. ? * & $ @ # ! |;
%), you will have to place a backslash "\" directly in front of these
characters or they will not be read correctly. An example is:
"/external.html\?link=http://www.trivium.net/womenshistorymonth". If you don't
have the "\" character before the "?" in this string, the string won't be
understood and can't be replaced. If you want
to replace coding which contains non-text characters (i.e. ? * & $ @ # ! |;
%), you will have to place a backslash "\" directly in front of these
characters or they will not be read correctly. An example is:
"/external.html\?link=http://www.trivium.net/womenshistorymonth". If you don't
have the "\" character before the "?" in this string, the string won't be
understood and can't be replaced.
- Regexp stands for Regular Expression which is a programming
term. Don't use this field unless you are familiar with programming
principles.
- An email message is produced detailing the number of
directories and files processed and the changes and substitutions made (where
appropriate). Remember to test changes prior to executing them.
Editing Files using a HTML
editor
This method is most useful for editing single files that require
more complex editing. You may need to edit the HTML markup for a particular
file if, for example, you need to change a link reference to fix a broken link.
This example is illustrated in the steps below. You do this by opening the
appropriate file in your HTML editor (such as WordPad, Notepad or HotMetal),
editing the html and saving the file immediately back into the archived
instance.
- Locate the file in WebDav and move it to your PC for
editing. Open the file using your chosen HTML editor (for example in WordPad
choose File - Open to open the file ready for editing).
- Edit the html source to correct the reference to the
incorrectly referenced file.
- Save the edited file and move back into the archived instance
via WebDav.
- Refresh the browser window containing the file you have
edited.
- Repeat steps 2 thru 4 if the corrections were not
successful.
Deleting Files
Occasionally files will need deleting if they have been gathered
in error (i.e. they weren't filtered out initially and they have been
gathered but are not relevant to the title gathered). This is a very simple
process in WebDav. The files (and their associated directories) to be
deleted can be right-clicked on and then choose the Delete option.
Creating Error Reports for PANDORA IT
Support Staff
If you encounter problems you are unable to fix you can log the
problem via the Report tab in Process Title. This screen allows
you to enter details of the problems in free text and provide IT staff with the
associated URLs.
- The first time a report is created for an instance you will be
asked if you wish to create one. Click the create button.
- The Report screen will be updated to allow you to create
a report. One or more problems can be logged within a report. The screen
incorporates an area for adding URLs, a free text area for describing the
problem you've experienced, facility to add, delete or save the report, a
dropdown field where you can view all problems in the report, and a facility to
advise IT staff if the problem is recurring throughout the site.
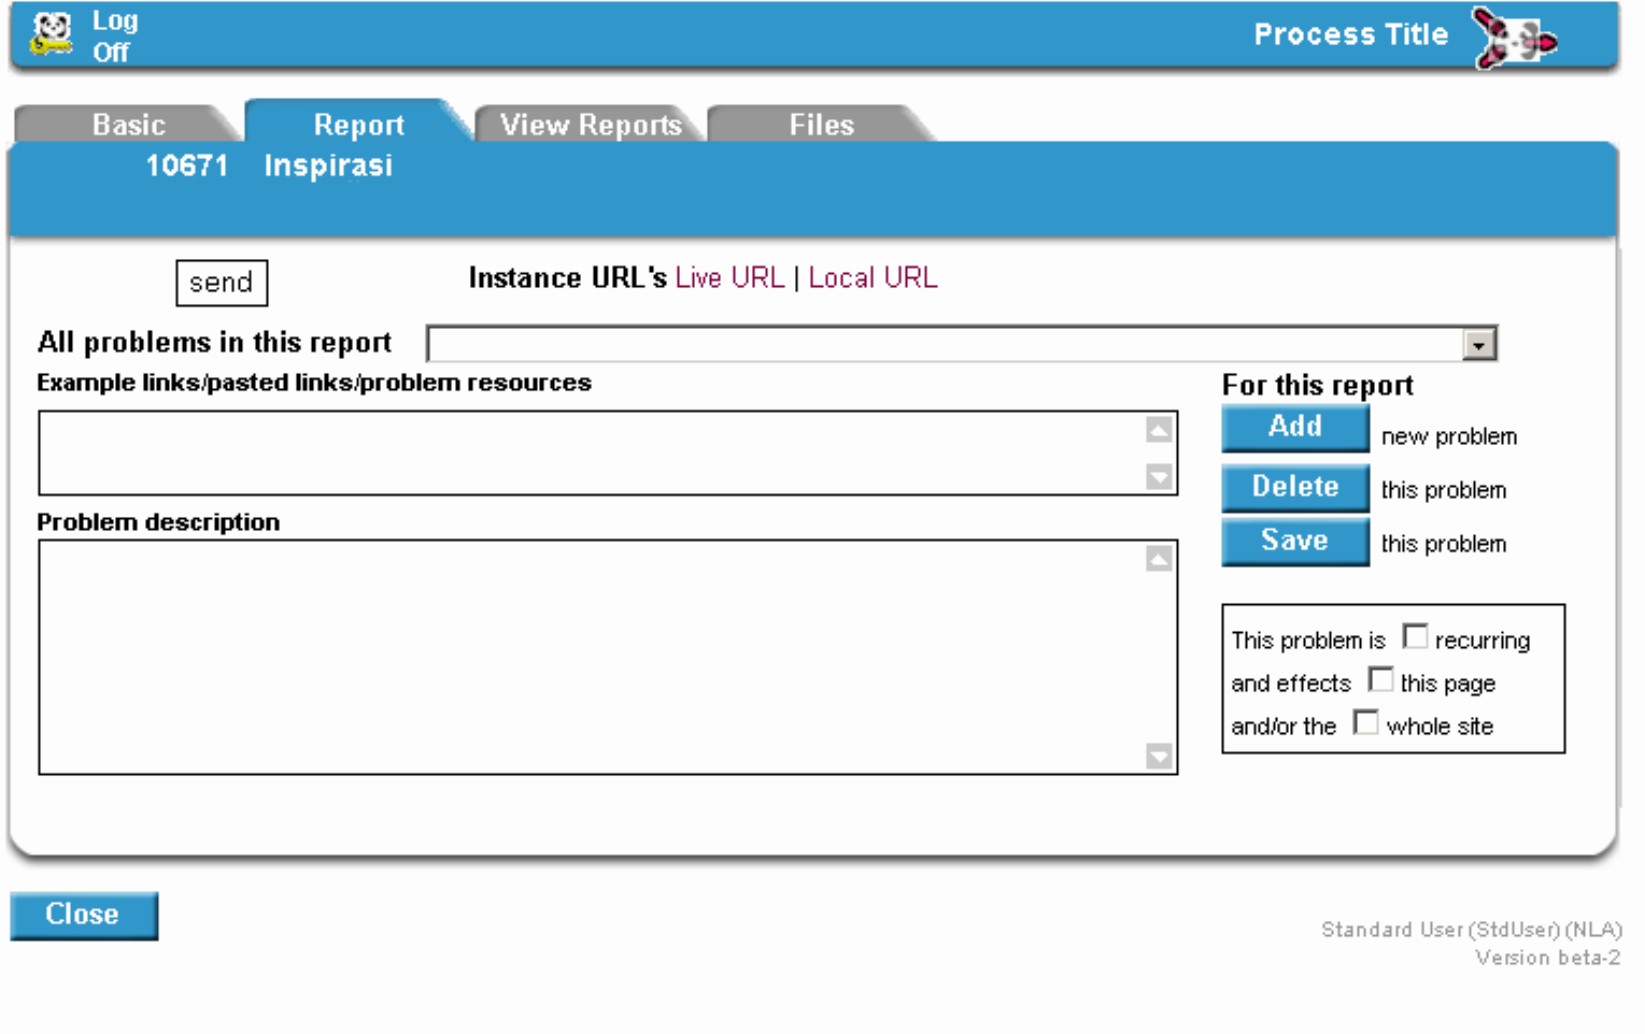
- Add a description of the problem and its associated URLs,
indicating whether the problem is confined to the page or not by checking the
appropriate box on the screen:
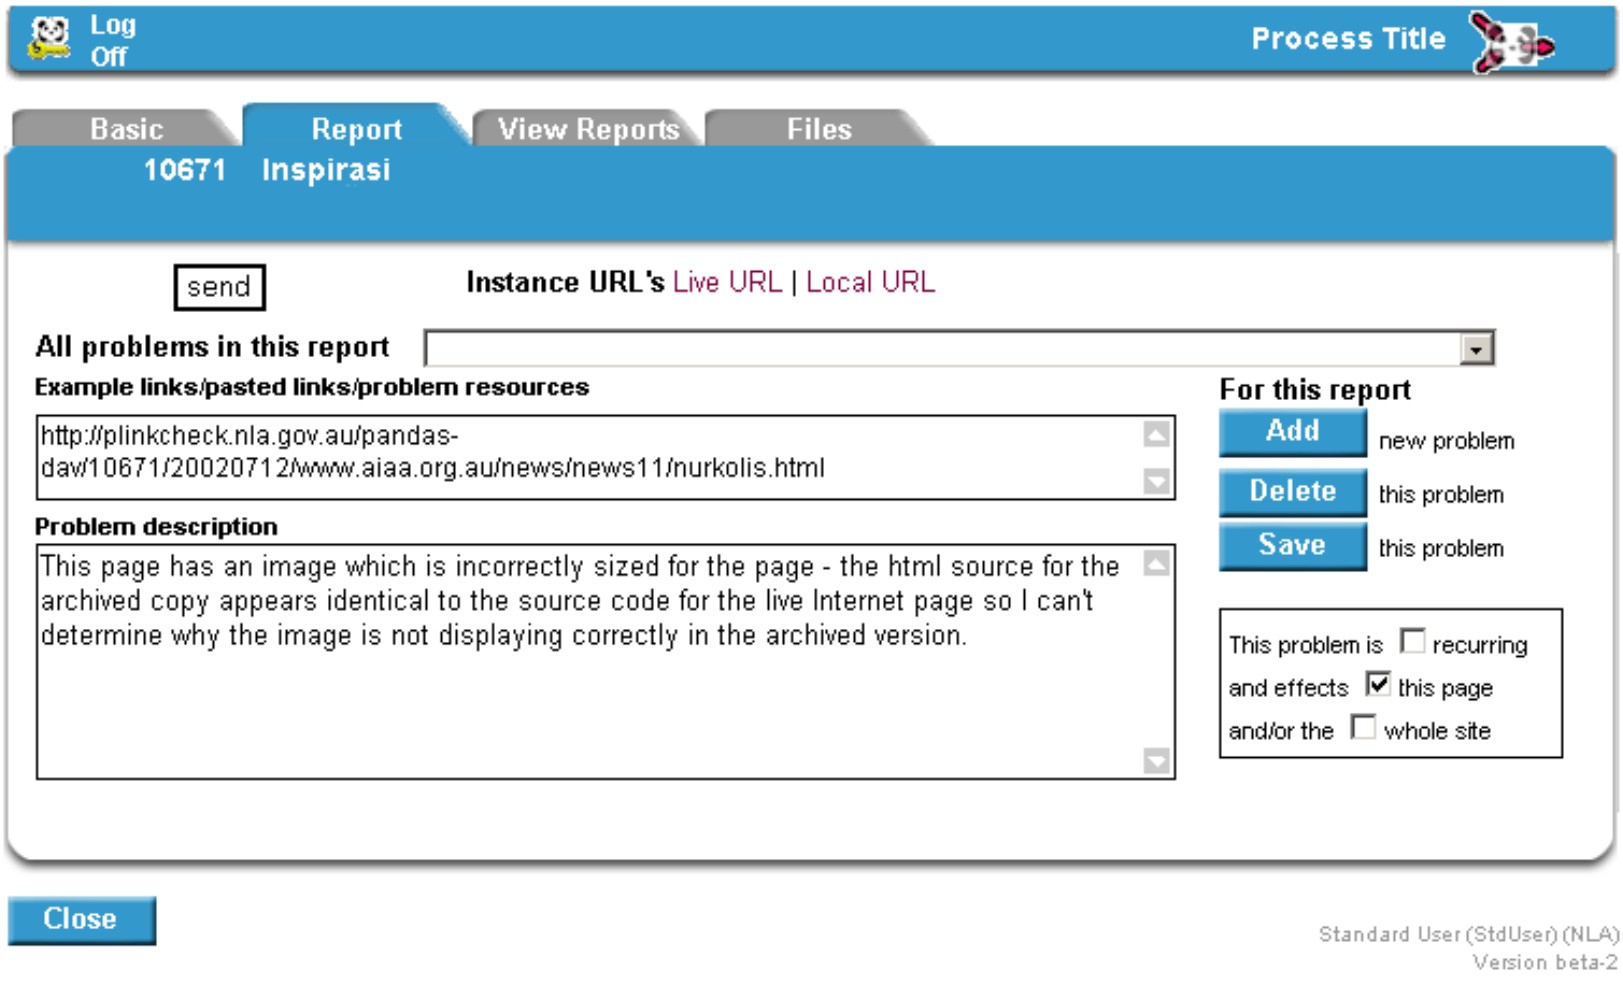
- Click Save to save the problem. The problem will now
appear in the dropdown area listing all problems in this report. Note that the
problem has not yet been sent to PANDORA IT staff, it has just been recorded.
Repeat steps 3 and 4 for additional problems in the gathered instance (however
first click the Add new problem button).
- When all problems have been described and saved click on the
Send button.
- All reports for the instance can be viewed via the View
Reports tab. This will also indicate whether the report has been checked by
IT or not.
Completing Processing
When the gathered title has been checked and the errors fixed the
instance can be archived. This option is not available when you need to report
on errors with an instance to PANDORA IT support staff. Only after these errors
have been fixed and the title returned to the owner can processing of an
instance be completed.
When ready to complete processing there are two
options: Archive or Delete. Clicking the Archive button
will create an archived copy of the instance ready to add to the
Title Entry Page. Delete will delete the
instance (an email message will be sent to you advising the instance has been
deleted).
Please note that there will be a delay of
at least five minutes and possible much longer between the completion of
processing and when the archived instance can be viewed from the
Display Details screen.
This delay is the
result of the system performing a number of functions on the archived title
including creating a "tar ball" of the archived instance and moving it to the
preservation storage location; and moving a copy of the files from the working
(WebDAV viewable) area to the display location.
You will need to design
your workflow to accommodate this delay, for example by doing processing in the
morning and working on display details in the afternoon. To keep track of the
titles you are working on you can add them temporarily to your
Favourites list which will provide you
with a handy list and quick access to the records. |
![[Pandora Archive logo]](http://pandora.nla.gov.au/nla/pandora/pandora6.gif)
![[Pandora Archive logo]](http://pandora.nla.gov.au/nla/pandora/pandora6.gif)
![[National Library of Australia]](http://pandora.nla.gov.au/nla/pandora/logo.gif)